Abstract
Azure File Storage is an ubiquitous service. It is so useful
that I have hardly seen an enterprise not making use of it. Recently Premium tier
of File storage is introduced with IOPS as 1,00,000 as opposed to standard File
storage which used to offer 1000 IOPS only. This premium tier now even makes
Azure File Storage natural choice for high performance demanding applications.
I have been architecting many scenarios and
implementations where I used Azure File Storage for running web applications. In
such a scenario your application binaries, DLLs, application files [or jar, war
files in case Java] are present on Azure File Storage and this Azure File
Storage is mapped as a drive to Azure VMs. This Azure VM then runs web servers
likes Tomcat, IIS and maps their website path to the drive mapped using Azure
File Storage. And this works awesome!
In today’s enterprise world DevOps has become a regular
practice. Naturally when you plan to deploy web applications you use pipelines
in Azure DevOps. In above scenario you would need to create Build and Release
pipeline that will deploy your application to Azure File storage. Unfortunately,
there is no default task exist in Azure DevOps that can publish the build output
to Azure File Storage. This is what I am going to build in this post.
Let’s go!
Setting up pre-requisites
For this blog post I am going to use .NET Core language
web application as my sample. It doesn’t matter if you use any other language-based
example. So I already have a DevOps Organization created and in the same I have
created one Project named as “MyNETCoreApp” as shown below –

It doesn’t matter which option you select for Agile
process while creating project in Azure DevOps. Selection of Agile process
while creation of project in Azure DevOps will matter in other important cases
of setting up your business process. Not in Build and Release pipeline. But
that is another blog on another day. Not today!
Next part is about creating the project n Visual studio
[or in your favorite IDE] and pushing the same project in this current Azure
DevOps Project Repo. I have it done already because I think this is straight forward
and no step by step guide is required. So My project Repo looks as follows –

So we are all set for now to create Build and Release
pipelines to release to Azure File Share.
Don’t believe on your eyes - Clearing up the confusion
When I asked my regular blog followers for the current topic
most of them responded saying “Azure DevOps already offers a way/task to release
the code to Azure Files.”. I said where? How and when did this happen? Then my
dearest followers [most of them - not all] sent below screenshot to me [without
Red and Green
highlights]–

They were not wrong because they had just a given a
quick look to the heading. Red highlighted Heading
is perfectly fine and it will make you believe that Azure DevOps do offer a
task to publish and release pipeline to Azure File Share. However if you focus
on description of the task Green highlighted;
you will see that Azure DevOps File Copy tasks do not publish to Azure Files but
to Azure Blob and Virtual Machine only. Confusion because of names!
I am sure you know the difference between Azure Blob
[https] storage and Azure File Share [SMB] storage. So moral of the story – we don’t
have any tasks default provided in Azure DevOps to release the code to Azure
Files share.
High Level Solution
Fortunately Azure Files can be accessed using Azure
PowerShell. So we can write our own custom PowerShell to copy the Build
Pipeline output to Azure Files in the release pipeline task of Azure DevOps. So
here are the high level steps –
2. Then add the task “Publish Artifact” with “Path to publish” as “Artifact Staging Directory” and “artifact publish location” as “Azure Pipelines”.
3. Create a Release pipeline.
4. Add PowerShell task to “remove existing Azure file storage content”. So basically we are cleaning up entire
5. Azure File Share if there are already any files
residual because of previous releases.
6. Add PowerShell task to “copy the latest application binaries to Azure Files share”.
6. Add PowerShell task to “copy the latest application binaries to Azure Files share”.
Build the “Build” Pipeline
Create Pipelines -> Builds -> New Pipeline.
I wanted to keep things simple therefore not following YAML
part. Therefore, click on “Use the classic editor” option as follow –

Then Select the options as follows –

Warning – As
you see in above screenshot I am selecting the “Master branch” for
creating Build and Release as shown by “Red” highlight.
In real life you don’t produce Build and Releases from Master branch. Using
Master branch for Release is madness. Never do that. My focus is to showcase
how can you build Release pipeline for Azure File Share. So not focusing on other
no related best practices here. Watch out!!
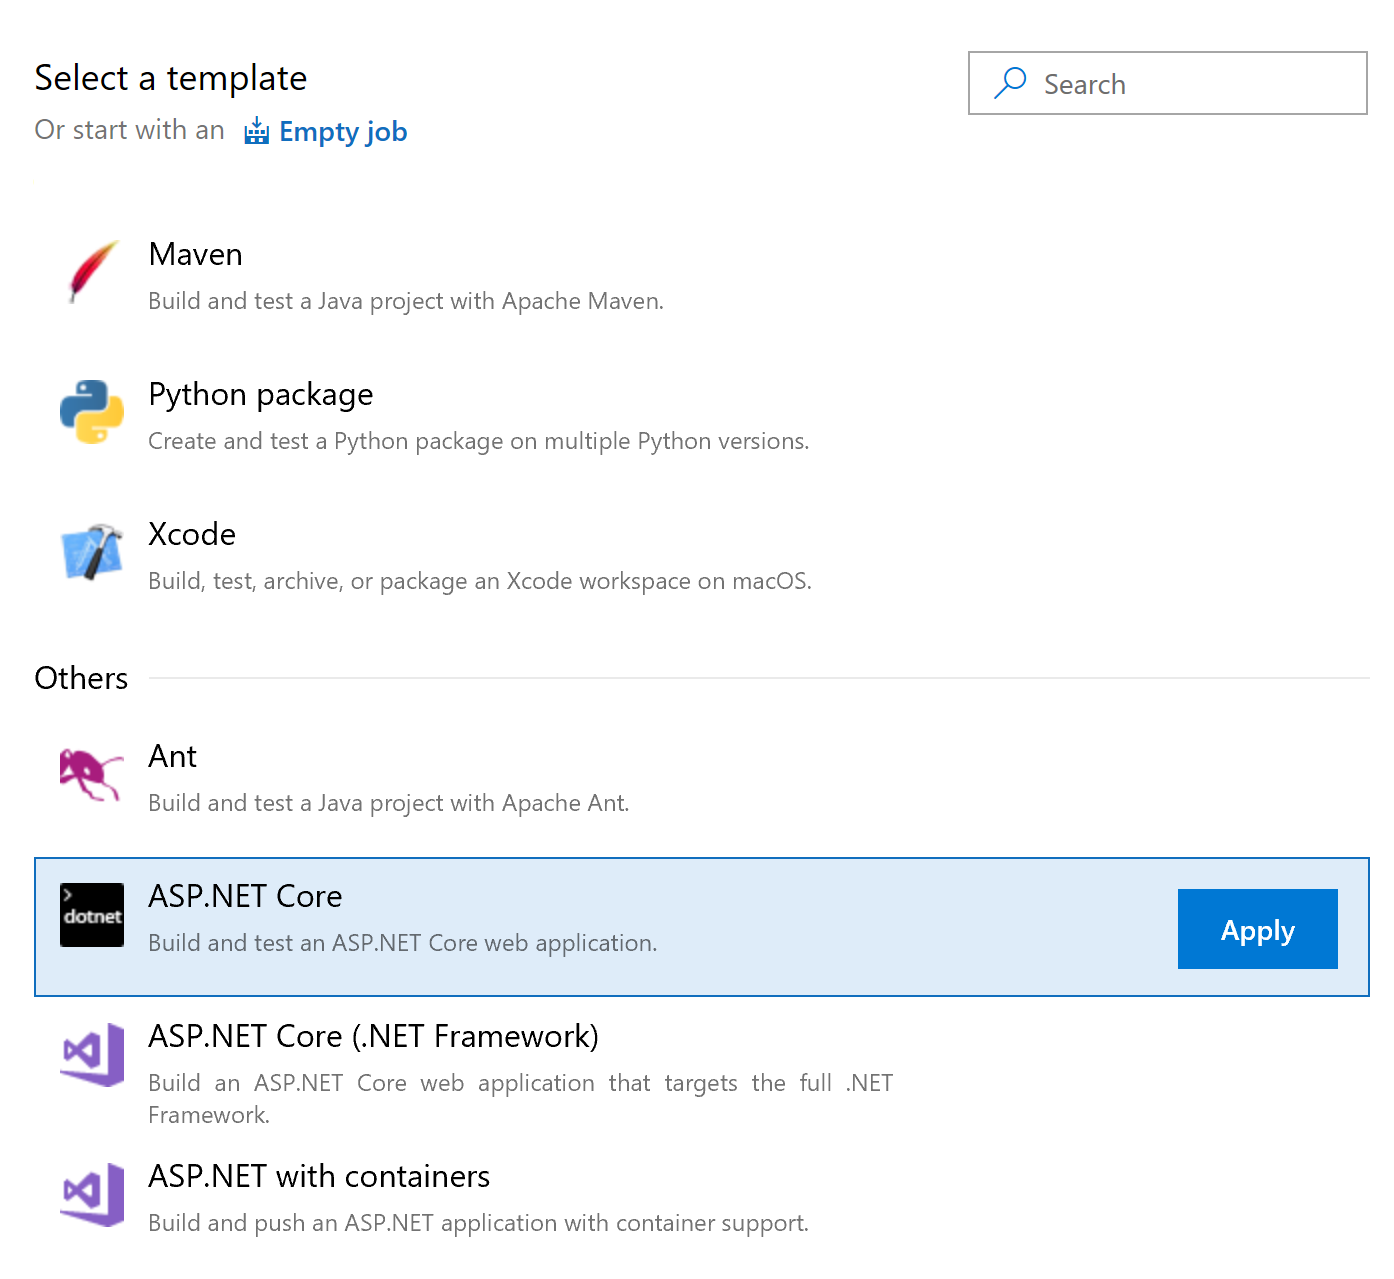
Select the option for task as “ASP.Net Core” as shown
below and click on Apply –
Select the option as “Azure Pipelines” on Agent Pool and
then “Agent Specification” as vs2017-win2016” as shown below. You can select
any other Agent specification based on your choice. –

Keep Restore, Build and Test settings as it is. Do not
change anything on that. Select Publish task and uncheck the option “Zip
Published Projects”. If we check this option then the output of build and
release that gets copied to Azure File
Share will be zipped. So unnecessarily you will also need a task to Unzip it. I
think that is just making more complex. Therefore I am unchecking this option
as shown below –

Then expand “Save & queue” option and select “Save”
option. On the save pop up simply click Save without any changes. Post this separate
Queue option will enable. Click on it to create a new build; keep the options
default on “Run Pipeline” screen. Then click on Run and post successful build
you should receive an email similar to shown below –

Build the “Release” Pipeline
Click on “Releases -> New Pipeline -> Empty Job”
as shown below.
Then rename the Release Pipeline name and stage 1 to
meaningful names as shown –

Do not “Save” yet. We have not mapped incoming Build
output as input to release pipeline yet. Let us do that first. Click on “Add an
Artifact” option and select the source type as Build. Automatically it will list
the latest build, select the options as shown below –

Under the stages you should see text like “1 job, 0
task.” Click on it. Then click on “+” sign against Agent Job tile. Select Azure
PowerShell from the task and click on Add. Provide below values inside the PowerShell
task –

As you can see in above I have named this task as “Remove
Existing File Storage content” and this is what we will do first before we
publish and release the new application code base.
Removal of Azure File Storage is not straight forward. Azure
Filed will not allow you to delete the directories unless they are empty.
Recently I had written a post and PowerShell on how can you delete Azure File
directories using Azure PowerShell. Refer it here - https://sanganakauthority.blogspot.com/2019/07/delete-azure-file-storage-directory-and.html
The inline PowerShell code I have built uses the same
above referenced PowerShell. The version that I used inside the PowerShell task
under Release pipeline can also be downloaded from here - https://github.com/kunalchandratre1/AzureDevOpsReleaseToFileStorage/blob/master/Remove-FileStorageContent.ps1.
Make sure that Blue highlighted values you replace in
your inline PowerShell code. Also make sure that you select “Latest” version
for PowerShell to run. This completes the first part of the release. Now click
on Save at the top to save the current changes.
Now we need another PowerShell task to publish the
latest application to Azure Files. Therefore follow the same step as earlier
and create a new PowerShell task. Now for this inline PowerShell we need to
record artifact name from Build output and refer it in the PowerShell. To get
your artifact name click on “Agent Job” tile and record the name of your
artifact and folder name as highlighted below –

Add the recorded Artifact name and folder name in the
inline PowerShell at line number 9 present in this link - https://github.com/kunalchandratre1/AzureDevOpsReleaseToFileStorage/blob/master/Publish-LatestappToAzureFiles.ps1.
Also make sure that you replace other values in the
inline PowerShell code when you add inside Azure DevOps Release pipeline Azure
PowerShell task. At last save the task and release pipeline. New PowerShell tasks
looks as below -

At the end your complete Release pipeline will look with
1 job and 2 tasks as shown below –

Click on “Create Release” and witness the magic of
releasing an application to Azure Files share.
Bonus Tip
If your application is also have deployed in another
region for Disaster recovery, then you can also add another Stage in the same
Release Pipeline as shown below –

Conclusion
And that’s it! Hope this article has given you how can
you release the application to Azure Files even using Azure PowerShell Release
Tasks even if there is no default task available.
Download the complete PowerShell code for removing the
content from Azure Files and publish the latest application to Azure Files here
–
Happy Pipelining!!
A humble
request!
Internet is
creating a lot of digital garbage. If you feel this a quality blog and someone
will definitely get benefited, don't hesitate to hit share button present
below. Your one share will save many precious hours of a developer. Thank you.
Very well explained kunal, Thanks for sharing
ReplyDeleteAmazing write-up
ReplyDeletewhat a fantastic post, this is so useful information cant wait to utilize, thank you for sharing this post, looking more form your side.
Great
ReplyDeleteInteresting phrase: "In real life you don’t produce Build and Releases from Master branch. Using Master branch for Release is madness."
ReplyDeleteThen what do you use the master branch for and which branch do you release?
Thanks for this Kunal, this is great, did you have any issues with authorization when connecting from the pipeline into the Azure File Share? My storage context seems to get created ok, but can't access azure file shares - looks like I need to enable Azure AD domain services on the file share - did you have to do this?
ReplyDeleteGot it working - did need Azure AD domain services enabled, service connection added to Storage File Data SMB Share Contributor role on the storage account, IP range of build server allowed on the storage account network settings and port 445 outbound on NSG for build server - thanks again
Delete